Setting up Laravel Mix for a React project
This post explains how to setup Laravel Mix for a React app with linting and hot reload enabled, without actually depending on Laravel.
Pull & go
If you'd like to skip doing it step by step, you might just pull the project from my repository and run npm install. However, I will probably not keep all the packages up to date and you might want to take the steps described below, to keep everything up to date. As well as configuring some stuff differently then I did for this project.
Getting started
Folder structure
First, create a new folder for the project and move into it. From here on all the paths will assume this directory.
Now create next folders within the project:
./dist/
./src/
./src/js/
./src/static/
The ./src subfolder will have our assets, such as Javascript files (./js), static assets (./static) and possibly more if required.
And the ./dist folder will be where we'll compile our assets.
Create index.html
Create a new file called index.html in the ./src/static directory and add some basic HTML markup in it that includes the main div with id root, which is where we'll render our React app:
<!doctype html>
<html>
    <body>
        <div id="root"></div>
        <script type="text/javascript" src="js/app.js"></script>
    </body>
</html>
Create package.json
In the root folder of the project create a new package.json file and create an empty json in it:
{}
The file will be used by npm to store dependencies and project information.
Setup React app
Add dependencies
Run
npm install --save-dev react react-dom prop-types
which will add the above packages to the devDependencies in your package.json
Note: prop-types is not actually a required dependency, but is generally recommended. And the linting we'll use in this guide will throw errors if you do not add propTypes to your components.
Create first React component
Create a new file called app.js in the ./src/js/ folder, which will be the entry point of our React app:
import ReactDOM from 'react-dom';
import React from 'react';

ReactDOM.render(
  <h1>
    Hello world!
  </h1>,
  document.getElementById('root')
);
Setup Laravel Mix
Add dependencies
Run
npm install --save-dev cross-env laravel-mix
to add latest Laravel Mix and cross-env as dev dependencies, which are both required for Laravel Mix to work.
Add Laravel Mix npm scripts
Now open up the package.json and add the scripts from Laravel Mix.
The whole package.json should now look something like this:
{
  "scripts": {
      "dev": "npm run development",
      "development": "cross-env NODE_ENV=development node_modules/webpack/bin/webpack.js --progress --hide-modules --config=node_modules/laravel-mix/setup/webpack.config.js",
      "watch": "cross-env NODE_ENV=development node_modules/webpack/bin/webpack.js --watch --progress --hide-modules --config=node_modules/laravel-mix/setup/webpack.config.js",
      "watch-poll": "npm run watch -- --watch-poll",
      "hot": "cross-env NODE_ENV=development node_modules/webpack-dev-server/bin/webpack-dev-server.js --inline --hot --config=node_modules/laravel-mix/setup/webpack.config.js",
      "prod": "npm run production",
      "production": "cross-env NODE_ENV=production node_modules/webpack/bin/webpack.js --no-progress --hide-modules --config=node_modules/laravel-mix/setup/webpack.config.js"
  },
  "devDependencies": {
    "cross-env": "^5.1.4",
    "laravel-mix": "^2.1.6",
    "prop-types": "^15.6.1",
    "react": "^16.2.0",
    "react-dom": "^16.2.0"
  }
}
You will be able to use these scripts with npm run {script_name} for development and building for production.
Setup Laravel mix config
Now create a new file in the root folder, called webpack.mix.js which will serve as Laravel Mix's config file and put the next code in it:
// Pull in Laravel Mix
var mix = require('laravel-mix')

// Configure what it does
mix
  // This is required for hot reloading
  .setPublicPath('./dist')
  // This will copy files from static folder
  // directly into dist folder
  .copy('src/static', 'dist')
  // This will process our entry point (app.js)
  // into the dist/js folder
  .react('src/js/app.js', 'dist/js');
Test it!
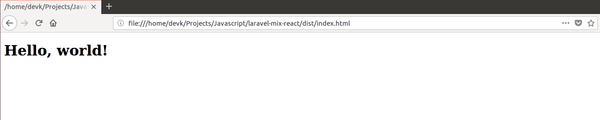
Now run npm run watch and open dist/index.html in your favourite browser and you should see "Hello World!".
Set up linting
Install dependencies
First install eslint dependencies with
npm install --save-dev babel-eslint babel-preset-react eslint eslint-friendly-formatter eslint-loader eslint-plugin-react
Eslint rules
Now create a new file in the root called .eslint.js, which will hold our eslint configuration. For this tutorial, we'll use the default eslint-plugin-react recommended settings. You can always add your preferred settings to the rules part or extend some other popular predefined settings, such as standard, Airbnb or Google.
And put the next contents in:
// http://eslint.org/docs/user-guide/configuring
module.exports = {
  'root': true,
  'parser': 'babel-eslint',
  'parserOptions': {
    'sourceType': 'module',
  },
  'plugins': [
    'react',
  ],
  'env': {
    'browser': true,
    'es6': true,
  },
  'extends': [
    // Load default configuration for react
    'plugin:react/recommended',
    // If you were to extend another popular
    // eslint config, you'd put it here
  ],
  // add your custom rules here
  'rules': {
    // allow debugger during development
    'no-debugger': process.env.NODE_ENV === 'production' ? 2 : 0,
    // Default no-unused-vars
    'no-unused-vars': 1,
    // jsx version of no-unused-vars
    'react/jsx-uses-vars': 1,
  }
}
Configure webpack to use eslint
Open up the Laravel Mix config webpack.mix.js and add the custom webpack configuration to lint your javascript files. The webpack.mix.js would look like this:
// Pull in Laravel Mix
var mix = require('laravel-mix')

// Configure what it does
mix
  // This is required for hot reloading
  .setPublicPath('./dist')
  // Add eslint to .jsx, .js and .vue files
  .webpackConfig({
    module: {
      rules: [
        {
          test: /\.(jsx|js|vue)$/,
          loader: 'eslint-loader',
          enforce: 'pre',
          exclude: /(node_modules)/,
          options: {
            formatter: require('eslint-friendly-formatter')
          }
        }
      ]
    },
  })
  // This will copy files from static folder
  // directly into dist folder
  .copy('src/static', 'dist')
  // This will process our entry point (app.js)
  // into the dist/js folder
  .react('src/js/app.js', 'dist/js');
Done!
And we're done! I encourage the use of additional popular styles mentioned above, which usually force nicer coder (such as forcing the use of semicolon or forcing not to use them).
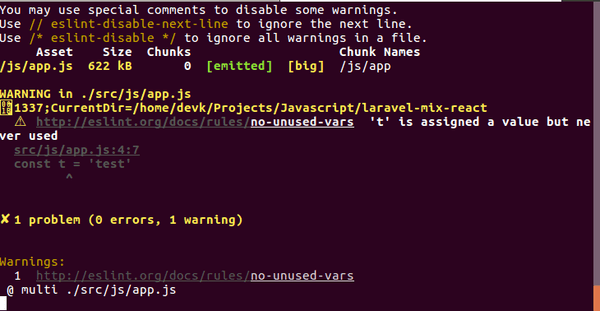
We can put a simple const t = 'test' in our src/app.js to test the linting and run npm run watch again. We should get a nice warning message showing:
Problems with hot reloading
Out of the box the npm run hot script takes care of hot reloading. The problem is that the hot reloading creates its own server on port :8080, meaining in order to use it, you have to load your js/app.js from localhost:8080/js/app.js, which will work for hot reloading, but not for other scripts, which expect the app.js to be on the same domain as our index.html.
At this time I have no simple solution for getting around that. We'd have to detect the command ran and replace
<script type="text/javascript" src="js/app.js"></script>
with
<script type="text/javascript" src="http://localhost:8080/js/app.js"></script>
If someone knows of a simple solution, you can post it as an issue on the repository or create a pull request.
The repository can be found on my github.